What is simulation?
A simulation is an imitation of a real system or process. It is used to understand, predict, or analyze how a system behaves under different conditions.


So, you’ve heard about Fusion 360 and now want to find out if the rumours are true…Can Fusion 360 do what other 3D modelling software’s like ProE, Inventor and Solidworks can do, and can it compete in industry against them?
The answer is YES!
Why not find out yourself and take a test drive of Fusion 360 for free.
Click here to access your free 30-day trial.
The software is available for windows and Mac users, it is relatively lightweight to install (800mb) so you don’t need a massively spec-ed PC.
After your free trial you can purchase Fusion 360 for around €500, this will allow you, as the user to access the design functionality and the manufacturing environment. In return this allows you to create CNC toolpaths, simulate machining and produce G-codes for your milling, turning and fabrication needs. Also included, is access to other environments that Fusion has to offer.
Getting started will require you to setup an Autodesk account, which your Autodesk products will be assigned too. From the website, you will be able to download the product and activate it for use.
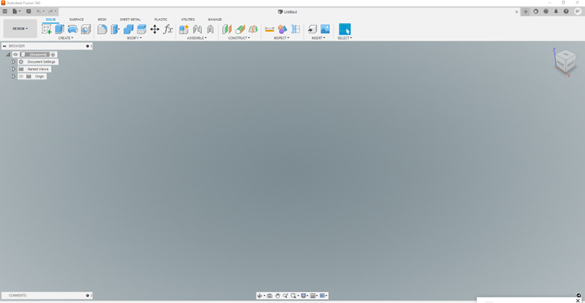
Once you open the product, you are greeted with this screen, this is the main screen, from here you can start exploring Fusion 360.
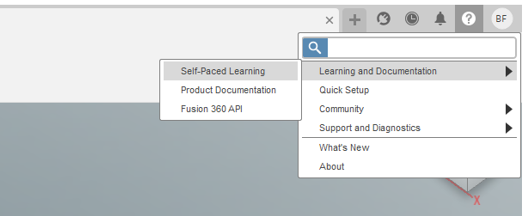
Navigating to the upper far right of the user interface, you will see a question mark icon, in here you will find a self-paced learning link, this link provides you with hundreds of hours of video content to delve into and upskill your Fusion knowledge within all the various environments Fusion 360 has to offer.
Fusion 360 is one of the easier 3D parametric software’s out there, it has an incredibly user-friendly interface, explains all the functions as soon as you hover over them. The main ribbon bar has all the most used functions as shortcuts, with all the other functions hidden below in a dropdown menu, which is easily customisable to the user preference, setting up your own keyboard shortcuts and creating a user toolbox for fast access.
In my experience the user has been able to get up to speed whether they are a new user to any modelling software or very knowledgeable from other packages, the crossover or getting up to speed is very quick and easy.
Getting started
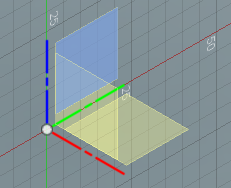
To create a simple model, click on the first icon to the left in the toolbar Ribbon called “Create Sketch” ![]() this icon lights up blue when activated, and waits for you to select a plane to sketch on, click on one of the three planes on your screen.
this icon lights up blue when activated, and waits for you to select a plane to sketch on, click on one of the three planes on your screen.
Once you’ve selected a plane, you will be brought into a 2D sketch environment, you will know you are in a sketch environment simply by the look of your toolbar ribbon (lines, circles and rectangles) and you will have a green button available on the right to finish sketch.![]()

If you are an AutoCAD user, this environment will be very familiar, creating a 2D sketch using all the function like line, circles, rectangles, fillets, chamfers ect. Once you you’re your sketch created, you can then constrain and dimension your sketch to your drawing tolerances.
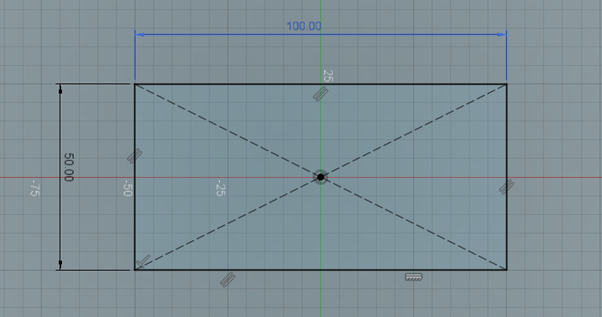
When your drawing is completed, click on the finish sketch icon.
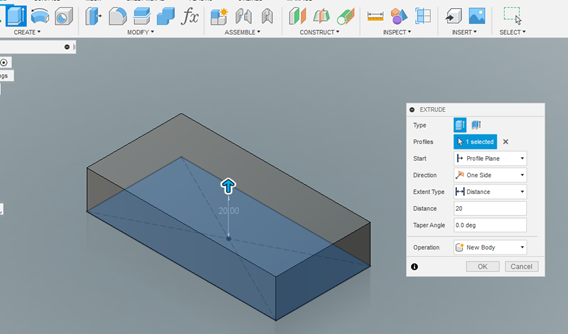
This brings you back to your home (3D) Environment, from here you can make your 2D sketch become 3D using tools such as extrude, revolve, sweep, ect.
Select your function, this will activate a dialog box for entry of data, enter your height distance and click ok.
And just like that, you have just completed your first model using Fusion 360.
Contact us directly to arrange a free demo!
A simulation is an imitation of a real system or process. It is used to understand, predict, or analyze how a system behaves under different conditions.
Learn what design means and how different types of design are used in the construction industry. Streamline your project with Symetri's digital solutions.
In this guide, we'll explain what a BOM is, how it works, and why it's a critical tool for product success. Whether you're a beginner or looking to optimize your BOM processes, this is your ultimate resource.
